Create Your First Model Using ArduPilot Cube Orange+
ArduPilot Cube Orange+ is a flight controller widely used for developing and testing custom flight control algorithms on real UAV hardware. Using the UAV Toolbox Support Package for ArduPilot® Autopilots, you can build flight control models in Simulink® and deploy them directly to the Cube Orange+ board. This workflow allows you to validate your algorithms on actual hardware, ensuring correct performance before deployment. In this topic, you will learn how to create a basic Simulink model and deploy it to the Cube Orange+ for real-time testing.
This topic helps you to:
Build a simple Simulink model using blocks from the UAV Toolbox Support Package for ArduPilot Autopilots.
Configure your model to target the ArduPilot Cube Orange+ hardware.
Deploy your model directly to the Cube Orange+ for real-time testing and validation on actual UAV hardware.
Create a Simulink Model
Create a Simulink model by launching Simulink in MATLAB and building a basic model using required blocks from the UAV Toolbox Support Package for ArduPilot Autopilots.
Start MATLAB®. From the MATLAB toolstrip, click the Simulink button.
Click the Blank Model template.
The Simulink Editor opens.
Add a required block using the quick insert menu. For example, Timestamp block.
Double-click anywhere in the model canvas. In the quick insert menu that appears, enter
Timestamp. A list of blocks appears. Verify that the Timestamp block from the UAV Toolbox Support Package for ArduPilot Autopilots library is selected. Check the library name listed under the block name and the block description in the pane to the right of the search results.
Add the Timestamp block to the model by pressing Enter.
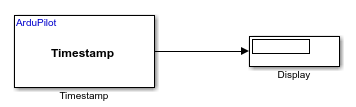
Add a Dipslay blocks and connect the blocks by creating lines between output ports and input ports. Then, save your model.
Configure Model Parameters for Cube Orange +
Set the hardware board in Simulink to ArduPilot Cube Orange + and
adjust model parameters to match the requirements of this specific autopilot. Ensure all
configuration options are correctly set for compatibility and successful deployment to
the ArduPilot Cube Orange + hardware.
In the Simulink model, go to the Modeling > Model Settings to open Configuration Parameters dialog box.

In the Configuration Parameters dialog box, set the required parameters.

Click Hardware Implementation and select
ArduPilot Cube Orange +from the Hardware board list.In the Build options, Ensure that
Build, load and runis selected for the Build action andCubeOrangePlusis selected for the Board.Do not change any other options.
Set the options for Vehicle.

Select the required ArduPilot vehicle type.
Verify the options for External mode.
You can use Monitor and Tune (External Mode) action to tune parameters and monitor a Simulink model running on your target hardware. For more information, see Monitor and Tune the Model Running on ArduPilot Autopilots.

Verify the settings match exactly as shown in the image. Do not modify any of the options.
Click Apply and OK.
Perform Monitor & Tune Simulation
The Monitor and Tune workflow in Simulink allows you to observe signal values and adjust parameters on your deployed algorithms in real time. Perform these steps.
Set a value for the Simulation stop time parameter. The default value is
10.0seconds. To run the model for an indefinite period, enterinf.
On the Hardware tab, in the Mode section, click Run on board and then select Run on board (External mode). If you see Connected IO selected instead of Run on board, click on it and choose Run on board (External mode).

Click Monitor & Tune.
Simulink automatically generates code from your control model, which is then integrated with the ArduPilot autopilot firmware. The integrated code is built and launched as a Software-In-The-Loop (SITL) simulation.
After the build completes, you will be prompted to reconnect your hardware in order to flash the generated executable. A pop-up window will be displayed with instructions.

Note
The Reconnect ArduPilot Board pop-up is only displayed when a physical ArduPilot board is selected. When using the ArduPilot Host Target, this step is skipped, as no hardware reconnection is required.