Concatenate images without image toolbox/montage function
2 visualizzazioni (ultimi 30 giorni)
Mostra commenti meno recenti
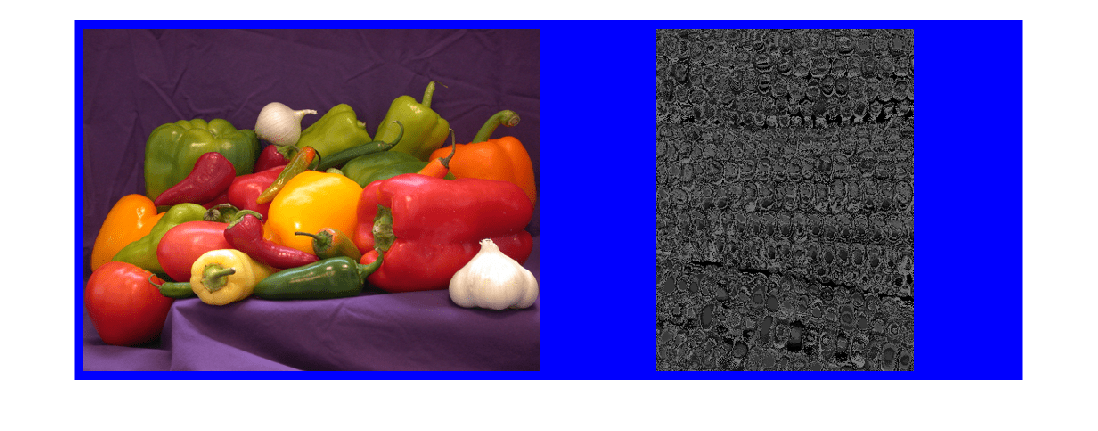
I am trying to "concatenate" some image files in a manner similar to either the montage or imtile functions, however, I need to be able to do this in vanilla matlab r2018a. The resulting image does not need to be displayed; it only needs to be created. I found this post How can I create a montage of images without using the montage function and I tweaked it to the following:
img1 = imread('<filename1>.png');
img2 = imread('<filename2>.png');
img3 = [img1 img2];
imshow(img3);
saveas(gcf, 'concatimg.png');
However, I have two problems which I am not sure how to remedy:
- How can I concatenate images of arbitrary size? E.g., if img1 is 300x300 and img2 is 250x325 is there some function to just add some "buffer" pixels or do I need to manually resize the images (or should I just be using subplot)? Also, how can I add buffer pixels surrounding my images as in this example (taken from the imtile documentation):

2. How can I save the composite image without the imshow and saveas function calls?
0 Commenti
Risposta accettata
Geoff Hayes
il 8 Apr 2020
Modificato: Geoff Hayes
il 8 Apr 2020
matquest - a very simple (hopefully accurate!) way would be to detemine the maximum width (columns) and height (rows) of the two images and then pad both so that they fill the larger image size. For example, padding the 300x300 image would result in a 300x325 image, and padding the 250x325 image would result in a 300x325 image too. Note that you don't have to pad to both dimensions just to the dimension that you want to concatenate across (so if you want to contcatenate the two images so that they are side by side, then both need to have the same number of rows. In this case, you would need 300x300 and 300x325 images where the first one maintains its size and the second is padded. Some code to pad in both dimensions might be
function mainPaddedImageTest
close all;
% sample images
img1 = uint8(zeros(300,300,3));
img1(:,:,1) = 255;
img2 = uint8(zeros(250,325,3));
img2(:,:,3) = 255;
maxNumRows = max(size(img1,1),size(img2,1));
maxNumCols = max(size(img1,2),size(img2,2));
paddedImg1 = pad(img1,maxNumRows,maxNumCols);
paddedImg2 = pad(img2,maxNumRows,maxNumCols);
compositeImage = [paddedImg1 paddedImg2];
function [paddedImage] = pad(img,numRows,numCols)
numChannels = 1;
if ndims(img) == 3
numChannels = size(img,3);
end
% create padded image and place original in top left corner
% can modify this code if you want the padding to appear elsewhere
paddedImage = uint8(zeros(numRows,numCols,numChannels));
paddedImage(1:size(img,1),1:size(img,2),:) = img;
3 Commenti
Geoff Hayes
il 9 Apr 2020
Modificato: Geoff Hayes
il 9 Apr 2020
matquest - glad to have been able to help. As for your question, do you mean what if one image is 200x300x3 and the other is just 200x300? If that is the case, then I would just convert the latter to a 200x300x3 like
imgAsGrayScale = randi(255,200,300);
imgAsRgb = uint8(repmat(imgAsGrayScale,1,1,3));
Since we repeat imgAsGrayScale for each of the red, green, and blue channels, then the imgAsRgb is still maintains the gray scale "colouring".
Più risposte (0)
Vedere anche
Categorie
Scopri di più su Image Processing Toolbox in Help Center e File Exchange
Community Treasure Hunt
Find the treasures in MATLAB Central and discover how the community can help you!
Start Hunting!
