Main Content

Build Simulink Model and Deploy Application

After connecting the development computer to the target computer, build the Simulink® model and deploy the standalone Linux® application to the Linux environment. The support package allows you to deploy Adaptive software component models, AUTOSAR Adaptive architecture models, DDS Blockset models configured with eProsima and RTI Connext vendors.

Build a model with Hardware board set to Embedded Coder Linux Docker Container or Embedded Coder Linux Docker Container - ARM64 to generate the application package (.mldatx) file. This setting is mandatory for the model to deploy it using support package.

Steps to build a model and deploy the application.

  1. For a Simulink model, set Hardware Implementation > Hardware board to:

    • Embedded Coder Linux Docker Container for x86_64 targets.

    • Embedded Coder Linux Docker Container - ARM64 for ARM targets.

  2. Set Code Generation > Build process > Toolchain to AUTOSAR Adaptive Linux Executable.

  3. Open Linux Runtime Manager application by using the command.

    linuxRuntimeManager

  4. Click the Linux Target > Prepare > Create & Deploy Application Package to create an application with source code.

    Or

    Click the Linux Target > Prepare > Create & Deploy Application Package > Create Application Package with Executable to create an application with executable and without source code.

  5. If you have an application package (.mldatx) file already created, select it. Or you can select the Simulink model.

    Programmatically:

    To create application package from Simulink model:

    % To create application pacakge with source code
    linux.createApplicationPackage(<modelName>);
    
    % To create application package with executable
    linux.createApplicationPackage(<modelName>, CreateExeForTarget = <TargetName>)
    
    To deploy the application package:
    tg.deployApplicationPackage(<NameOfSoftwarePackage>);

  6. The Linux Runtime Manager builds the model, creates the application package, and deploys the package.

If there is an application package (.mldatx) file available, you can also deploy it on target in the following way:

  • Right-click the application package and select Open. The following window opens.

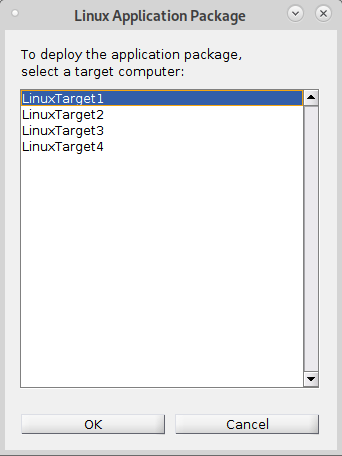
  • Choose a target and click the OK button. The selected application gets deployed on the target.

The application name is displayed under the target computer. To view the list of measurable signals and tunable parameters, select the deployed application. Alternatively, use these commands.

% To view the available signals
availableSignals = tg.getMeasurements(<applicationName>);
% To view the available parameters
availableParameters = tg.getParameters(<applicationName>);

Video - Deploy AUTOSAR Adaptive Architecture Model

This video walks you through how to build and deploy an AUTOSAR Adaptive Architecture model configured for external mode simulation.

This video will walk you through the modeling and deployment of AUTOSAR Adaptive Architecture Application using Embedded Coder support package for Linux applications. In this video, we will cover development of service components, configuring the AUTOSAR Adaptive model, deploying the AUTOSAR Adaptive model, calibrating the deployed application.

I want to design an AUTOSAR application which is headlight control system application, where the headlights of a vehicle should turn off when the outside light is high and the headlights of the vehicle should turn on when the outside light is low.

This is AUTOSAR adaptive architecture model for headlight control system. This model has three components. From the left side, the first model is sensor model. Second model is controller model. The third model is actuator model. Two models on the left side communicate with each other using adaptive events. Two models on the right side communicate with each other using adaptive methods.

First model outputs the outdoor light sensor data. Second model receives the outdoor light sensor data. It causes the method from the third model to turn on or turn off the headlight. The sensor model is configured for external mode to tune the outdoor light sensor data in runtime.

This is an outdoor light sensor component. Sensor data is modeled using tunable parameter outdoor light data. It has a knob block to tune the value of sensor data during external mode simulation.

This is headlight controller component. This receives the outside light sensor data when the event is triggered. It causes the method from the third model to turn on or turn off the headlight.

This is headlight actuator component. Setting the headlight status service is modeled using Simulink function. Headlight status value is logged using ara log block.

I am opening the configuration parameters of outdoor light sensor component to enable the external mode and setting the IP address of target machine and port number in XCP server configuration. In order to deploy this architecture model on Linux target, I am opening the configuration parameters of this architecture model to set the hardware board value to Embedded Coder Linux Docker Container.

After setting the hardware board, I am opening Linux runtime manager from Apps gallery. I am entering the IP address, username and password of the Linux target machine in target configuration settings and connecting to the target. Now the target is connected.

Now I am clicking on the Create and deploy application package button and selecting the architecture model to deploy it on the target. Now we can see that the application is deployed. I am selecting the outdoor light sensor component and clicking on Monitor and tune button to start external mode simulation. Now the external mode simulation has been started.

Now to start all other components, I am selecting the headlight control system and clicking on Start application button. Now all three components are running on target. In log viewer we can see that the headlights are turned on. Now I'll tune the value of outdoor light data to a value greater than 5, and we can see that the lights are turned off in the log viewer. If I change the value of outdoor light data to a value less than 5, in the log viewer, we can see that the lights are turned on again.

In summary, we have an AUTOSAR Adaptive Architecture Model which has three components. We deployed it on Linux target using Linux runtime manager, which created three executables, one for each component. The executables communicate with each other using ara com. We performed external mode simulation of outdoor light sensor component to tune the parameter values in runtime.

For more information, go to the documentation of Embedded Coder Support Package for Linux applications.

Video Player is loading.
Current Time 0:00
Duration 0:00
Loaded: 0%
Stream Type LIVE
Remaining Time 0:00
 
1x
  • Chapters
  • descriptions off, selected
  • captions off, selected

      Deploy DDS Blockset Models Configured with RTI Connext Vendor

      Follow these steps to deploy DDS model configured with RTI Connext vendor:

      1. Set the value of environment variable NDDSHOME_LINUX on host to the RTI Connext software folder path on Linux target machine.

        setenv('NDDSHOME_LINUX', '<Path for the software>')
        For example:
        setenv('NDDSHOME_LINUX', '/home/user/RTIDDS/glnxa64/rti_connext_dds-6.0.1_gcc7.3.0')

      2. On the Linux Runtime manager, click Connect button. If the target setup is not done, a pop-up opens to fill the deployment location.

        If the docker container is already present, recreate the container using the command:

        tg.restartContainer(recreateContainer=true)

      3. Click the Linux Target > Prepare > Create & Deploy Application Package and select the DDS Blockset model.

        This will generate .mldatx file for the selected model and deploys it on the target.

      Select the application and click on Start Application to launch the application on target.

      Video - Deploy DDS Blockset Model

      This video walks you through how to deploy a DDS Blockset model.

      Video Player is loading.
      Current Time 0:00
      Duration 0:00
      Loaded: 0%
      Stream Type LIVE
      Remaining Time 0:00
       
      1x
      • Chapters
      • descriptions off, selected
      • captions off, selected
      • en (Main), selected

        See Also

        | |

        Topics