Import Excel Files into the Safety Analysis Manager
If you have safety analysis spreadsheets in Microsoft® Excel® files, you can import the spreadsheets into the Safety Analysis Manager. You can also import spreadsheets with document attributes into the Safety Analysis Manager.
Configure and Import a Spreadsheet
To import a spreadsheet from Excel, first configure the spreadsheet by following these steps:
Create and save a new Excel file. If you import an Excel spreadsheet file with more than one sheet, the Safety Analysis Manager imports only the sheet in the first tab.
Enter the headings for each column. For each heading cell, in the Number section, the number format list menu is
General. Each sheet column must include a heading.In the rows below the headings, enter content that corresponds to each column. Use the same format for each cell in the column:
To define a check box column, enter
TRUEorFALSEinto the column cells.Otherwise, the importer interprets the cell columns as text.
For example, this spreadsheet includes two text columns and one check box column.

Next, import the spreadsheet.
Close the Excel file.
Open the Safety Analysis Manager. On the Apps tab, under Model Verification, Validation, and Test, click Safety Analysis Manager.
In the app, close the Safety Analysis Manager subwindow.
In the File section, click Import.
Importing the spreadsheet shown above produces this Safety Analysis Manager spreadsheet.

Import Document Attributes
To create a spreadsheet that includes document attributes:
In the cell in the first row and column of the spreadsheet, enter
DOCUMENT ATTRIBUTES.DOCUMENT ATTRIBUTESis case sensitive.In the cells in the
DOCUMENT ATTRIBUTEScolumn, enter the names of the document attribute properties. In the next column, enter the values.Leave an empty row between the document attributes and the spreadsheet.
In the row below the empty row, in the same column as the document attribute properties, enter the word
SPREADSHEET.SPREADSHEETis case sensitive.In the next row, enter the headings for each column. For each heading cell, in the Number section, the number format list menu is
General. Each section column must include a heading.In the rows below the headings, enter content that corresponds to each column.
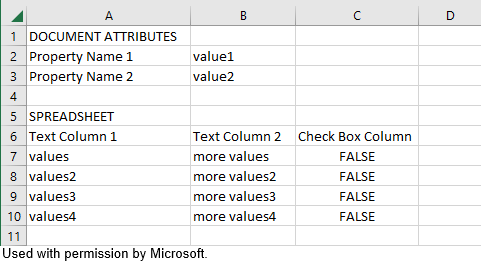
For example, this image shows the spreadsheet for the previous example with two document attributes.

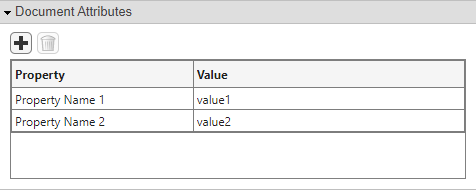
Importing this spreadsheet also imports the document attributes.
