Deployment and Verification Using PX4 Host Target and jMAVSim/Simulink
UAV Toolbox Support Package for PX4® Autopilots provides the option to simulate PX4 autopilot algorithms that you develop in Simulink®. The workflow is based on Simulation-In-Hardware (SIH) (Software in the Loop). The support package supports simulation of algorithms by generating an executable on the host, referred as PX4 Host Target using the SIH in Host Target simulator, with jMAVSim or Simulink for visualization.
Note
The PX4 Host Target supports code generation and deployment, similar to other supported hardware boards.. You can also perform signal monitoring and parameter tuning of the Simulink model by selecting this option.
About Simulation-In-Hardware (SIH) Simulator
Simulation-In-Hardware (SIH) is an alternative to Hardware-In-The-Loop (HITL) simulation for quadrotors, fixed-wing vehicles (airplanes), and VTOL tailsitters. SIH is beneficial for new PX4 users to become familiar with PX4, explore its various modes and features, and learn to fly a vehicle using an RC controller within a simulation,something that is not possible with Software-In-The-Loop (SITL). For more information, see Simulation-In-Hardware (SIH).
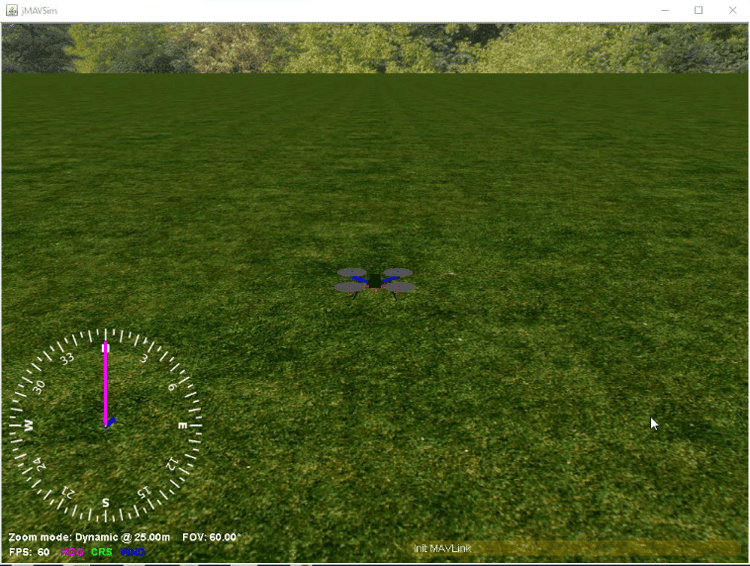
About jMAVSim
jMAVSim is one of the supported simulators for PX4-based targets. During the hardware setup of UAV Toolbox Support Package for PX4 Autopilots, this simulator is downloaded and installed, and allows you to view the flight of a quadcopter running the PX4 algorithm that you develop in Simulink. Currently, jMAVSim is primarily used as a visualizer, not as a simulator. By using jMAVSim, you can test the algorithm for the desired take off, flight, and land actions.
Preparing PX4 Host Target Using Hardware Setup Screens
You can use Hardware Setup process in UAV Toolbox Support Package for PX4 Autopilots to prepare the support package for using the PX4 Host Target and testing the connection with SIH simulator and jMAVSim visualizer.
Perform these steps as part of Hardware Setup to enable PX4 Host Target and test the jMAVSim visualizer:
In the Select a PX4 Autopilot and build configuration Hardware Setup screen, select PX4 Host Target as the PX4 Autopilot board. The supported Build Target file is
px4_sitl_default.Proceed with the subsequent step of Hardware Setup process to build the firmware and verify that the firmware build is successful.
In the Test Connection Hardware Setup screen, click Launch PX4 Host Target and jMAVSim. The jMAVSim visualizer opens in a new window and shows the flight of the quadcopter. This is a test flight using a pre-configured algorithm in the support package to ensure that the necessary components for the visualizer and simulator are installed.
Running PX4 Host Target from the Simulink Model
After you prepare the flight controller algorithm using the Simulink blocks available in UAV Toolbox Support Package for PX4 Autopilots, you can launch the SIH simulator to verify the flight. To do this:
In the Modeling tab, click Model Settings. In the Configuration Parameters dialog box:
In the Hardware board list, select PX4 Host Target.
Under Target Hardware resources > Build Options, select the Build action as Build, load and run.

Select
SIH in Host Targetas the simulator.Vehicle type selection is determined by the chosen airframe configuration.
Vehicle Visualization: You can select
jMAVSimorSimulinkfor vehicle visualization.For more information on using jMAVSim as visualizer, see Simulate Manual Control for Fixed-Wing with PX4 Host Target. For information on using Simulink as visualizer, see Visualize 3D Scenarios in Unreal Engine with PX4 Host Target Simulation.
If you select
No display, you can use QGroundControl (QGC) to visualize the trajectory. For more information to configure QGC, see Configuring QGC for Vehicle Visualization Without a Display.Click Apply and then OK.
On the Hardware tab, in the Mode section, select Run on board, and then select one of these options to launch SIH simulator:
To view the flight of the PX4 based flight controller based on the algorithm that is present in the Simulink model, click Build, Deploy & Start. The jMAVSim simulator is launched after sometime in a separate window.
To view the flight of the PX4 based flight controller based on the algorithm and perform signal monitoring and parameter tuning of the Simulink model, click Monitor & Tune. The visualizer is launched in a separate window. The visualizer depends on the selection for Vehicle visualization option in the Configuration Parameters dialog box.
If required, use jMAVSim as the visualizer and the SIH simulator for your setup. For more information, see Visualize 3D Scenarios in Unreal Engine with PX4 Host Target Simulation.
Note
It has been observed that on some Ubuntu® 18.04 Virtual Machines, there are issues while launching jMAVSim and PX4 Host Target from MATLAB®. You might encounter a java crash dialog on these systems in place of the expected jMAVSim and PX4 Host Target Windows®. To workaround these behavior, follow the below steps.
Build the Simulink model for PX4 Host Target and wait for the build to complete.
If the jMAVSim and PX4 Host Target are not launched automatically after the build is complete, then launch a Terminal.
Navigate to the PX4 Firmware directory in the launched Terminal.
Execute the following command in Terminal to manually launch both PX4 Host Target and jMAVSim.
make px4_sitlTo tune parameters and monitor signals, click Connect from Hardware tab of Simulink toolstrip after PX4 Host Target and jMAVSim are launched.
Note
With PX4 Firmware v1.12.3, it has been observed that the PX4 Host Target may exhibit issues with modules not responding after one hour of simulation time.
With PX4 Firmware v1.12.3, it has been observed that the drone in SITL mode crashes sporadically.
Set the number of EKF instances to
1to reduce the crashes substantially. To do this, setEKF2_MULTI_IMUandEKF2_MULTI_MAGparameters to1in QGC.
Note
On Ubuntu 18.04 platform, it is recommended that you set the sample time
as 1 millisecond for the Simulink models to be deployed on PX4 Host
Target. If the sample time is greater than 1 millisecond,
issues may occur while writing to some uORB topics such as
actuator_outputs.
Configuring QGC for Vehicle Visualization Without a Display
Perform these steps if you select No display for
vehicle visualization.
Note
It is recommended to use QGC QGC version 4.3.0.
In the QGC, click the gear icon and select Application Settings and go to Comm Links.

Click Add and add link configuration settings.

Set the IP address information. Check the WSL IP address from Windows.
Open Command Prompt in Windows.
Execute the following command:
wsl hostname -I
Click Add Server and OK.
Note
Select Automatically Connect on Start option to avoid connecting manually each time.
Select the comm link you created and click Connect.
Restart the QGC for the changes to take effect.