CAN Communication in Simulink Using PackNGo
This example shows how to use the PackNGo functionality to create a ZIP file containing the generated code from a CAN communication Simulink® model.
Adjust the parameters and blocks according to your specific application and hardware requirements.
Vehicle Network Toolbox™ provides Simulink blocks for transmitting and receiving live messages via Simulink models over networks using the Controller Area Network (CAN) format. This example uses the CAN Configuration, CAN Pack, CAN Transmit, CAN Receive, and CAN Unpack blocks to perform data transfer over a CAN bus. See the example Get Started with CAN Communication in Simulink.
Open the Simulink Model for Transmit and Receive CAN Messages
Open the model to transmit and receive a CAN message carrying a sine wave data signal. The model is designed to transmit a single message per timestep. A DBC file defines the message and signal used in the model.
open_system("CANCommunicationPackNGo")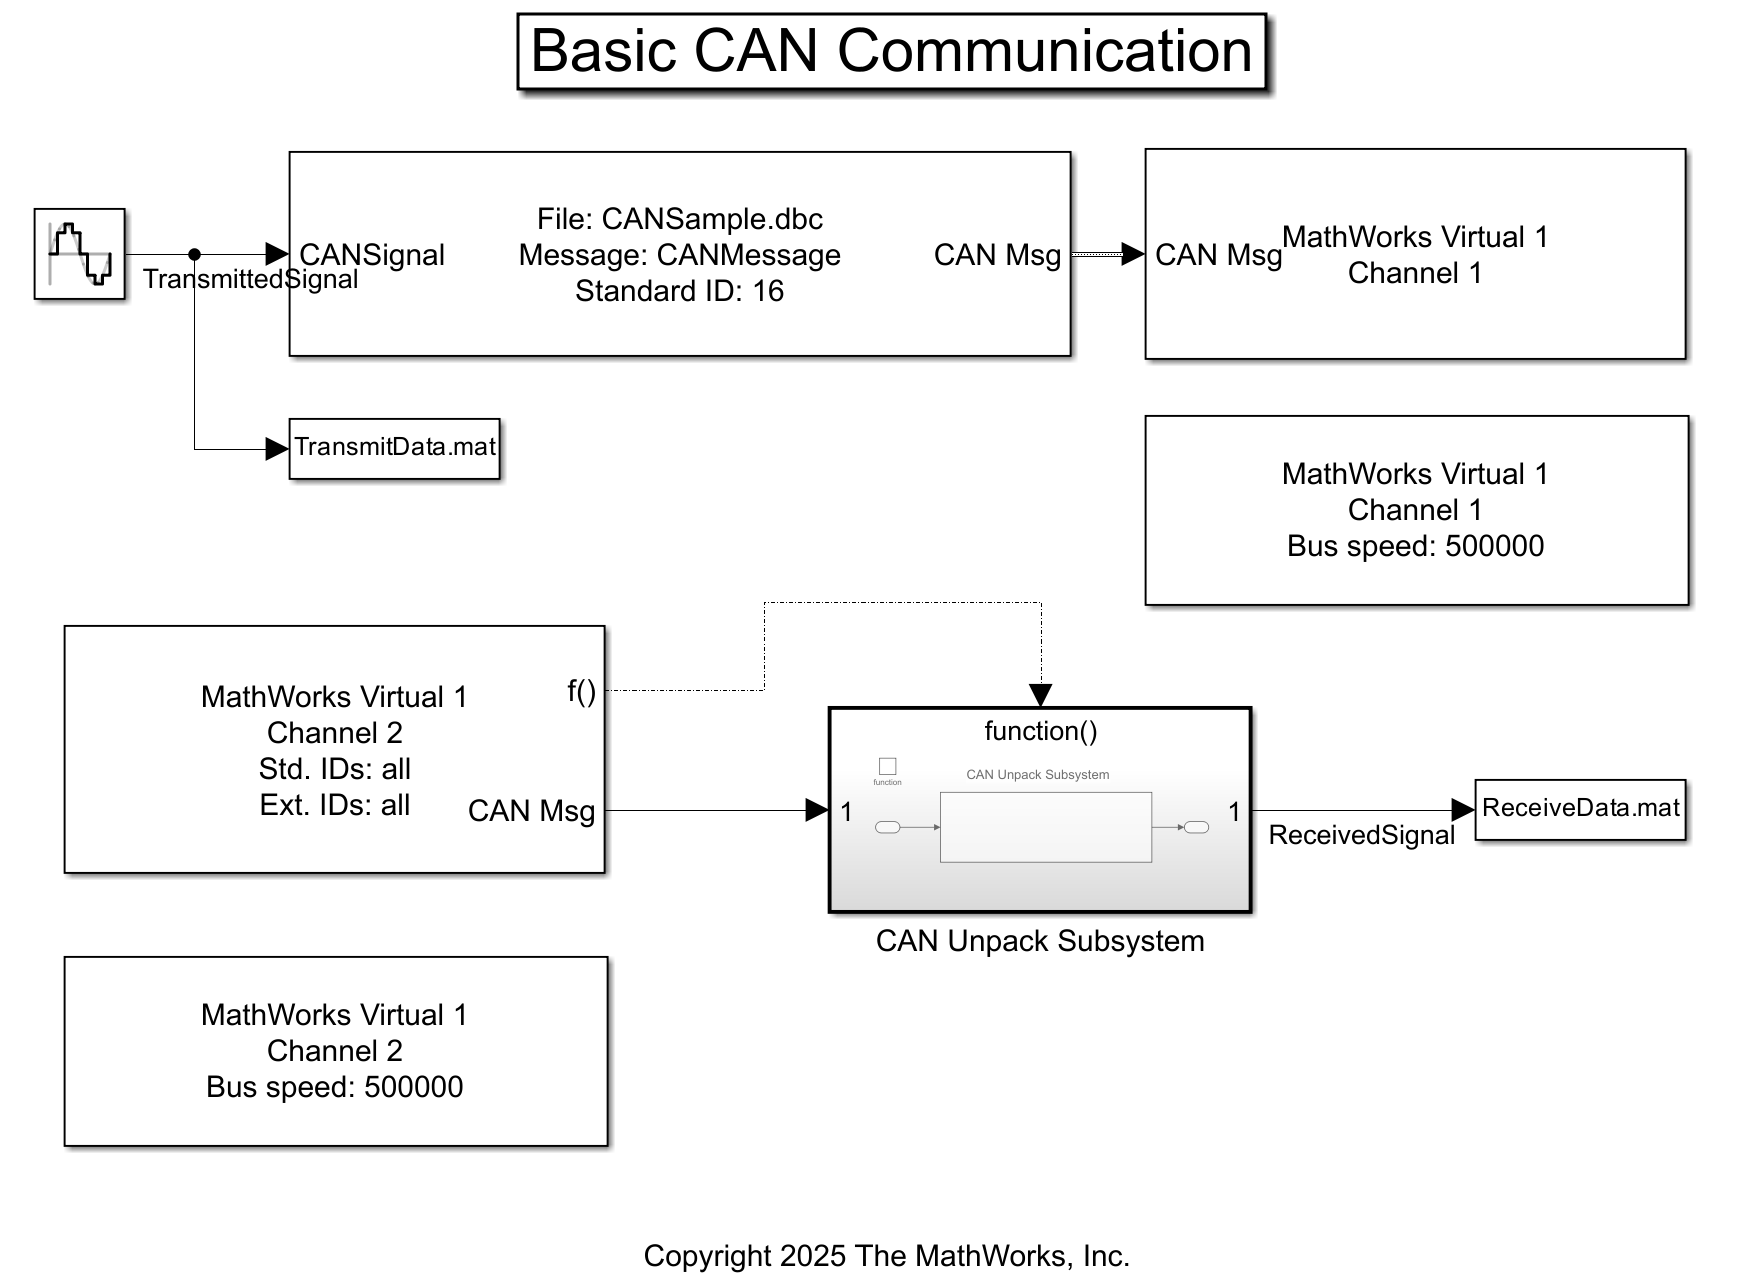
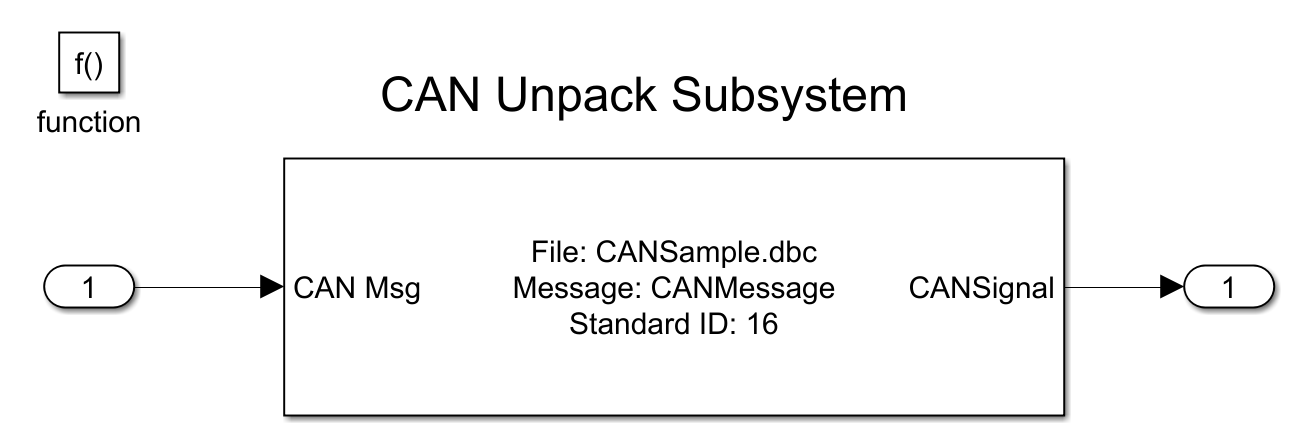
The CAN Receive block generates a function-call trigger if it receives a new message at any particular step. This indicates to other blocks in the model that a message is available for decoding activities. Signal decoding and processing is performed inside the Function-Call Subsystem (Simulink).
When you run the model, it outputs the data by creating the TransmitData.mat and ReceiveData.mat files, which contain the source data and the decoded signal from the CAN message, respectively.
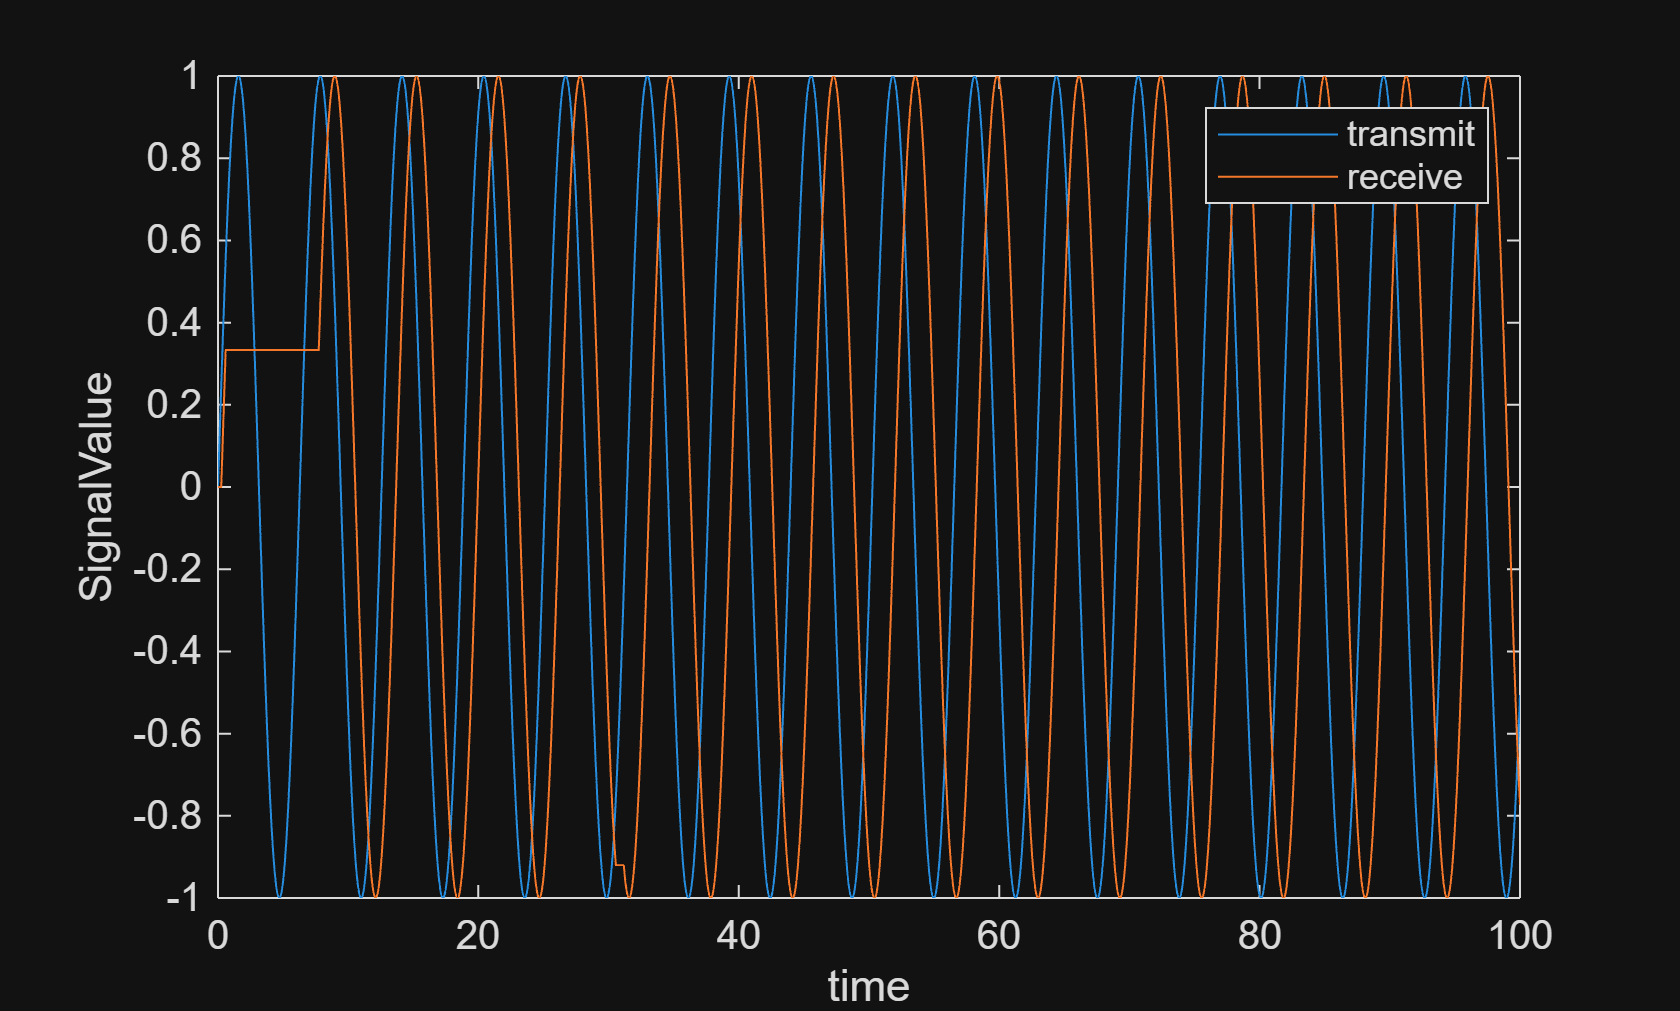
transmitData = load("TransmitData.mat");
receiveData = load("ReceiveData.mat");
Plot the sine wave values before and after transmission. The X-axis corresponds to the simulation timestep and the Y-axis corresponds to the value of the signal. The phase shift between the two plots represents the propagation delay as the signal travels across the network.
plot(transmitData.ans(1,:), transmitData.ans(2,:))
hold on
plot(receiveData.ans(1,:), receiveData.ans(2,:))
legend('transmit', 'receive');
xlabel('time');
ylabel('SignalValue');
Configure Model for Code Generation
Configure PackNGo ZIP file packaging from the code generation pane. The code generator uses packNGo to output a ZIP file during the build process.
Go to Modeling > Model Configuration Parameters.
Select the Code Generation node, and set the system target file to grt.tlc for real-time target in this example.

Pack the generated code and required artifacts to a single, flat ZIP file.
set_param('CANCommunicationPackNGo', 'PostCodeGenCommand', 'packNGo(buildInfo)');
With the PackNGo setup complete, build the model by clicking the Build icon (Ctrl+B).

At the end of the build process, the code generator outputs the ZIP file. The folder structure in the ZIP file is flat.
Verify Output Data
To verify the generated code, use the following steps.
Unzip the compressed file.
Move the executable (
CANCommunicationPackNGo.exe) to the unzipped folder.Run the executable.
Check and plot the
TransmitData.matandReceiveData.matcreated.
You can now deploy the package by transferring the packaged code (CANCommunicationPackNGo.zip) to your target hardware or simulation environment.