HL-20 with Flight Instrument Blocks and Visualization Using Unreal Engine
This model shows NASA's HL-20 lifting body and controller modeled in Simulink® and Aerospace Blockset™, using Unreal Engine® for visualization. This model simulates approach and landing flight phases using an auto-landing controller. The Instrument Panel subsystem uses aircraft-specific gauges from the Aerospace Blockset™ Flight Instrumentation library.
The HL-20, also known as personnel launch system (PLS), is a lifting body reentry vehicle designed to complement the Space Shuttle orbiter. Designed to carry up to ten people and very little cargo[1], the HL-20 lifting body was to be placed in orbit either launched vertically via booster rockets or transported in the payload bay of the Space Shuttle orbiter. HL-20 lifting body was designed to have a powered deorbiting accomplished with an onboard propulsion system while its reentry was to be nose-first, horizontal, and unpowered.
The HL-20 lifting body was developed as a low cost solution for getting to and from low Earth orbit. The proposed benefits of the HL-20 were reduced operating costs due to rapid turnaround between landing and launch, improved flight safety, and ability to land conventionally on runways. Potential scenarios for the HL-20 were orbital rescue of stranded astronauts, International Space Station crew exchange if the Space Shuttle orbiter was not available, observation missions, and satellite servicing missions.
Note: This example is not supported in Simulink Online.
Create HL-20 Skeletal Mesh
To prepare a new aircraft for use in Aerospace Blockset™ with Unreal Engine® (UE) visualization, create a skeletal mesh that uses one of the custom skeletons. This was done for HL-20 using the Custom aircraft skeleton and the following workflow.
Get the AC3D file from ~/matlab/toolbox/aero/animation/HL20/Models/HL20.ac.
If using Blender for the conversion, set it up to import AC3D files (cf. https://wiki.flightgear.org/Howto:Work_with_AC3D_files_in_Blender).
Follow the seven steps in Prepare Custom Aircraft Mesh for the Unreal Editor to convert file “HL20.ac” to “HL20.fbx”, and then import that skeletal mesh into UE.
For HL-20, many of the bones are unnecessary and therefore are not connected to any mesh objects. For example, there is no second wing or any propellers. However, you must still create all the bones so that its skeleton matches the Custom skeleton in the support package.
The HL-20 model in Aerospace Blockset has the following skeletal bone connections.
Use Unreal Engine Visualization
Once the custom mesh is available as an aerospace asset for UE, the Aerospace Blockset > Animation > Simulation 3D > Simulation 3D Aircraft block can use it to implement the HL-20 airframe.
NASA HL-20 Lifting Body Airframe Example
Open the example model.
mdl = "aeroblk_HL20_UE";
open_system(mdl);
The model appears as follows.
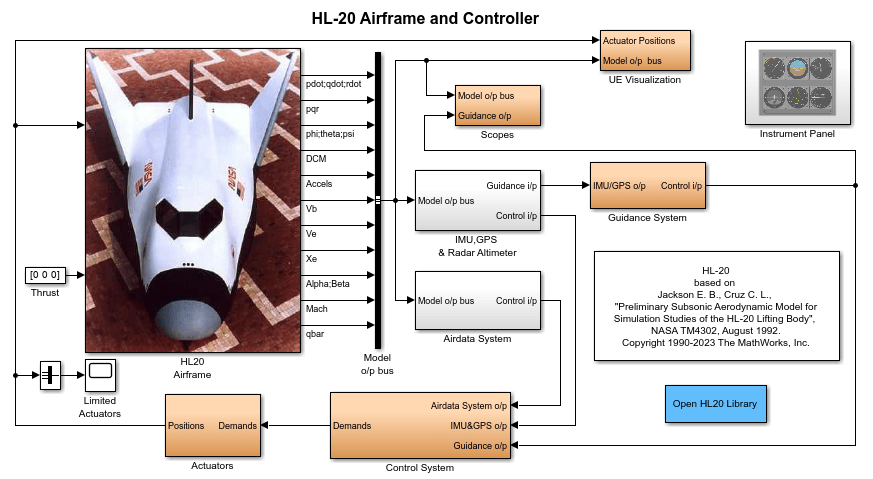
The UE Visualization subsystem (shown below) sends the body location (Xe) and rotation ([phi, theta, psi]) to the Simulation 3D Custom Pack block, which assembles the translation and rotation matrices for the Simulation 3D Aircraft block to position the HL-20 model and all of its parts. For more realism, this model adds the rotations of the control surfaces as well as landing gear retraction and extension. These rotations are calculated in the Actuator Breakout subsystem.

To place the HL-20 correctly in this airport scene, the Xe Adjustment for HL-20 subsystem adds an offset to the incoming location.

The Actuator Breakout subsystem (shown below) sets the position for all the control surfaces as well as for the landing gear. The landing gear is initialized in the retracted state and set to extend when the height above ground level (AGL) is below a certain number (e.g. 300 feet). The actuator commands cannot all be directly applied to the control surfaces, since the HL-20 is an unusual aircraft with high-dihedral wings with single flaps, no tail, and four body flaps, two on the top and two on the bottom. The wing flaps are used for both aileron and elevator actions, whereas the body flaps are used as conventional flaps, spoilers, and in differential mode to assist the ailerons.

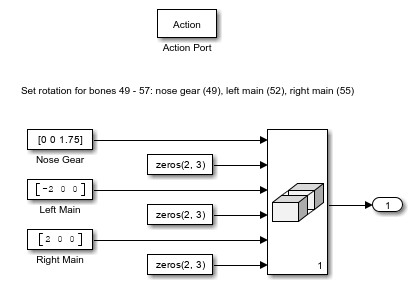
The Retracted Action subsystem (shown below) for the landing gear rotates them to their retracted positions, whereas the Extended Action subsystem returns all rotations to zero.
Before running the model, note that Simulation Pacing has been turned on so that the simulation clock matches the rate at which the model data was taken.
After clicking the Run button, allow a few seconds for the 3D visualization window to initialize.
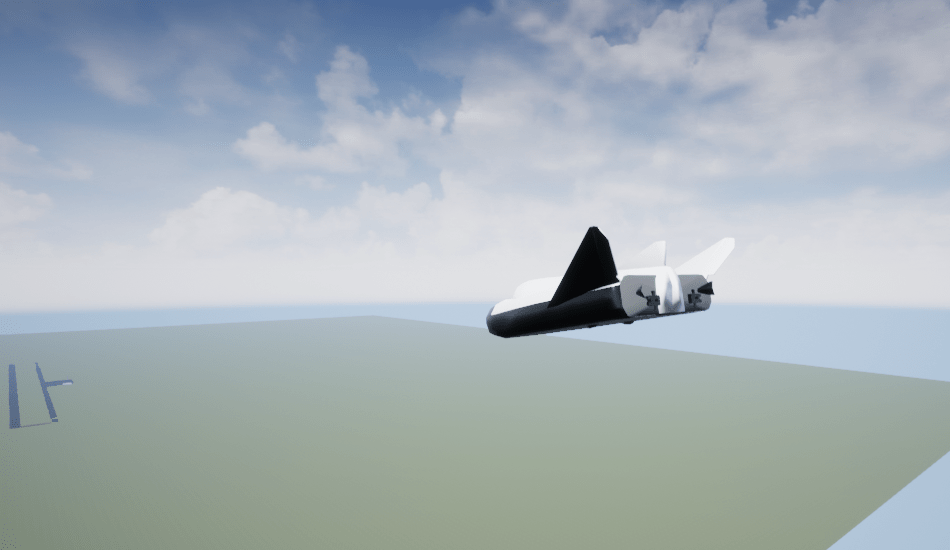
You should now see the HL-20 descending towards the airport, initially with the landing gear retracted.
Once it is simulating, you can switch between camera views by first left-clicking inside the 3D window, then using the keys
0through9to choose between ten preconfigured camera positions. For more information on camera views, see the Run Simulation section in Customize Scenes Using Simulink and Unreal Editor.


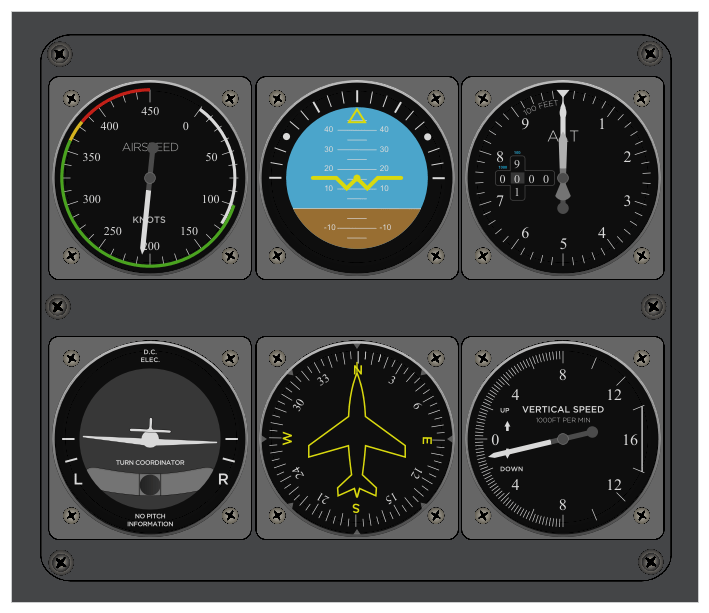
To see the flight instrument gauges during the run, open the Instrument Panel.


References
[1] Jackson, E. B., and C. L. Cruz, “Preliminary Subsonic Aerodynamic Model for Simulation Studies of the HL-20 Lifting Body,” NASA TM4302 (August 1992).