Create Axes-Based ROIs
R2026bAxes-based ROIs enable you to draw and edit regions of interest on images displayed
using imshow or in MATLAB Graphics axes. Axes-based ROIs offer
maximum customization of appearance and behavior, including line width, marker style,
and edge color. Use axes-based ROIs for fine-grained control over ROI appearance,
integration with existing axes-based apps, or access to the assisted freehand,
crosshair, or cuboid ROI types.
You can create axes-based ROIs using these approaches.
Using a creation convenience function such as
drawcircle, which enables you to interactively draw or programmatically specify an ROI in a single command.Using an object creation function such as
images.roi.Circle. Use this approach when you want to specify the appearance and behavior of the ROI before you specify the shape and position of the ROI. After you create the ROI, use thedrawfunction to interactively draw the ROI on an image. Thedrawfunction also enables you to redraw an existing ROI, preserving the appearance of the ROI.
The table shows the supported ROIs and their respective creation convenience functions.
| Description | ROI Creation Convenience Function | Object Creation Function |
|---|---|---|
| drawassisted | images.roi.AssistedFreehand |
| drawcircle | images.roi.Circle |
| drawcrosshair | images.roi.Crosshair |
3-D
| drawcuboid | images.roi.Cuboid |
| drawellipse | images.roi.Ellipse |
| drawfreehand | images.roi.Freehand |
| drawline | images.roi.Line |
| drawpoint | images.roi.Point |
| drawpolygon | images.roi.Polygon |
| drawpolyline | images.roi.Polyline |
| drawrectangle | images.roi.Rectangle |


Create Axes-Based ROIs
This example shows how to create axes-based ROIs.
Create ROI Using Convenience Function
Creation convenience functions enable you to create axes-based ROIs in a single command. You can use a creation function to interactively draw the ROI over an image, or use name-value arguments to define the ROI and skip drawing.
Read and display an image.
I = imread("pears.png");
imshow(I)
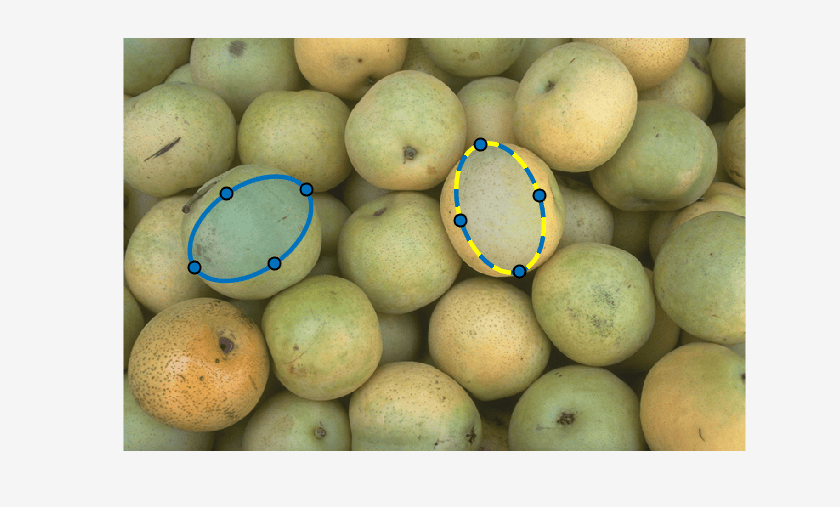
Create an Ellipse object by using the drawellipse function. Customize the appearance of the ROI by specifying the StripeColor name-value argument. The function enables an interactive drawing mode in the image display. Click the image and drag to draw the ROI.
roi = drawellipse(StripeColor="y");To create an ellipse fully programmatically, specify the size and position using name-value arguments. For an ellipse, specify the Center, the SemiAxes, and the RotationAngle values.
roi2 = drawellipse(Center=[150 225],SemiAxes=[80 50],RotationAngle=35);
Create ROI Using Object Creation Function
Object creation functions enable you to specify the appearance and behavior of the ROI before you draw it or specify its position programmatically.
Display the pears image in a new figure.
imshow(I)
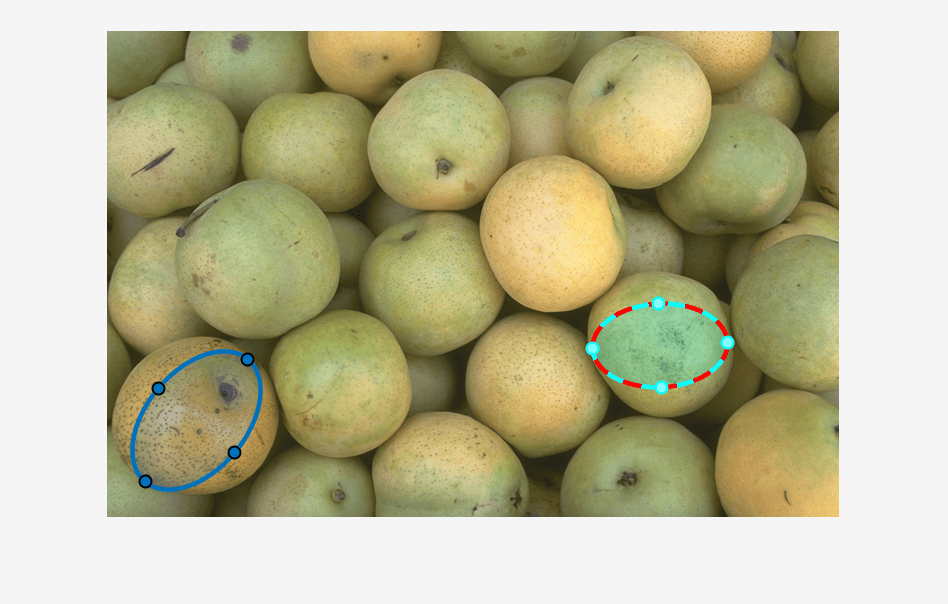
Create an Ellipse object, specifying its appearance but not its size or position.
roi3 = images.roi.Ellipse(Color="c",StripeColor="r");
To enable interactive drawing of the ROI, use the draw function. Then, click the image and drag to draw the ROI.
draw(roi3)
To create an ellipse fully programmatically, specify the size and position using name-value arguments. To display the object, you must specify the parent axes as an input argument. Otherwise, the function creates the object but does not display it.
roi4 = images.roi.Ellipse(gca,Center=[90 390],SemiAxes=[80 50],RotationAngle=50);
Create Axes-Based ROIs in Apps
To add axes-based ROIs, parent the ROI object to a UI axes in your app. For
example, in the Design View of App Designer, drag an
Axes from the Component Library onto
the canvas, then add a startupFcn callback by right-clicking the
app node from the top of the Component Browser hierarchy and
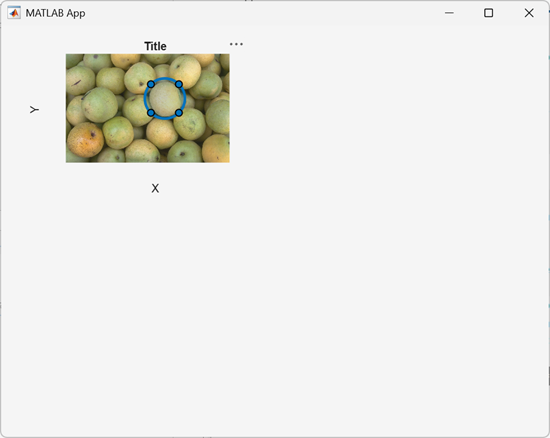
selecting Callbacks > Add StartupFcn callback. Within the callback, specify code to display the image and create a
circular ROI. You must specify the UI axes, app.UIAxes, as the
parent of the image and the ROI.
function startupFcn(app)
    imshow("pears.png",Parent=app.UIAxes);
    c = drawcircle(app.UIAxes);
end
Click Run to save and run the app. The app opens and displays the image. Click and drag to draw the circle ROI on the image.
You can also create an axes-based ROI using its object creation function, such as
images.roi.Circle. After you create the ROI, call the
draw
function to define the shape and position of the ROI and add it to a UI axes in your
app.

