Requirements Editor
Create and edit requirements
Description
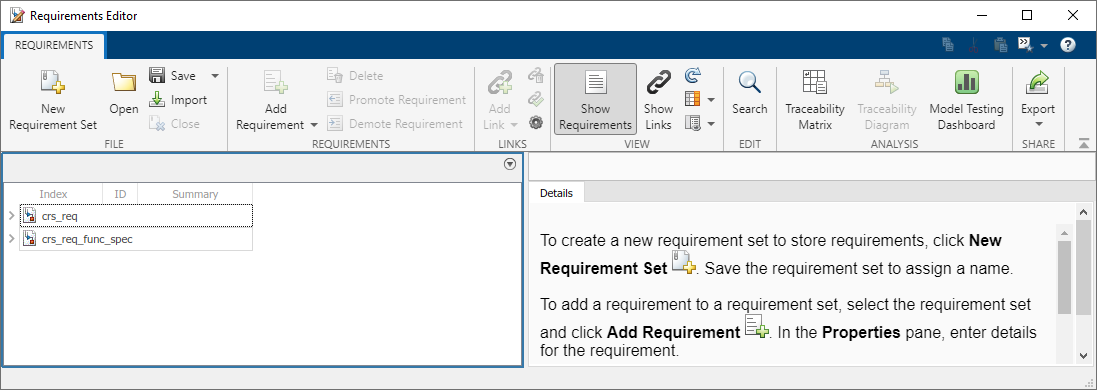
Use the Requirements Editor app to create requirement sets, add requirements, import and export requirements, and link requirements to blocks and other supported artifacts.
Open the Requirements Editor App
Simulink® Toolstrip: On the Apps tab, under Model Verification, Validation, and Test, click Requirements Editor.
MATLAB® Toolstrip: On the Apps tab, under Verification, Validation, and Test, click Requirements Editor.
MATLAB command prompt: Enter
slreq.editor.
Examples
To create a new requirement set:
In the Requirements Editor, click New Requirement Set.
Specify the name and file location of the requirement set. The editor saves the requirement set as a SLREQX file and the requirement set appears in the Requirements Editor.
You can open existing requirement sets by clicking Open and
selecting a requirement set file. To delete a requirement set, click a requirement set
and click the Close button ![]() . Removing a requirement set does not delete the SLREQX
file.
. Removing a requirement set does not delete the SLREQX
file.
To add requirements to a requirement set:
In the left pane, select a requirement set.
In the Requirements section, click Add Requirement.
Each requirement you create creates an associated slreq.Requirement object. You can edit the properties of the requirement in
the Requirements Editor or programmatically. To adjust the properties in the
Requirements Editor, click the requirement. The properties appear in the
right pane of the editor.
To view requirements as a document, click Show Requirements > Document View. You can use the multi-line document view to see requirement details without using the right pane of the Requirements Editor.

The document view shows the requirements content and the links in two columns.
Tip
Maximize the viewing space in the Requirements Editor by minimizing the
right pane. In the right pane, click the Actions button ![]() and select Minimize.
and select Minimize.
To configure the contents of the document view:
In the Requirements Editor, click the Columns button
 and select Select
Attributes.
and select Select
Attributes.Add columns to the document view by using the Column Selector dialog box. Select the item from the Hidden columns list and click Add.
Remove columns from the document view by selecting the item from the Display column names in this order list and clicking Remove.
Change the order of the columns by selecting the item from the Display column names in this order list and clicking Move up or Move down.
Apply the changes by clicking OK.
Tip
To ensure that the Requirements Editor displays the contents of the requirement description with the expected formatting, add the Content column instead of the Description column to the document view.
To link requirements to artifacts in models:
In an open Simulink model, click a model element.
In the Requirements Editor, click the requirement you want to link.
In the Links section, click Add Link > Link from Selection in Simulink.
For more information, see Create and Store Links.
To link requirements to lines of MATLAB code or to plain text code, such as C or H files:
Open the MATLAB code or plain text code in the MATLAB Editor.
Note
You cannot create links to MATLAB code in MLX files.
Select the lines of code that you want to link.
Tip
To link to MATLAB functions and enable change tracking for the entire body of the function, create the link to the line that contains the
functionkeyword.In the Requirements Editor, select the requirement you want to link.
In the Links section, click Add Link > Link from Selection in MATLAB Editor.
For more information, see Create and Store Links.
To set the value of built-in requirement properties, custom attributes, or stereotype properties:
Open a requirement set.
In the View section, click Show Requirements.
Select a requirement.
Set the value of a property or attribute in the right pane:
Built-in property — Under Properties, set the property to the specified value.
Custom attribute — Under Custom Attributes, set the custom attribute to the specified value.
Stereotype property — Under Stereotype Attributes, set the stereotype property to the specified value.
To set the value of built-in link properties, custom attributes, or stereotype properties:
Open a requirement set.
In the View section, click Show Links.
Select a link.
Set the value of a property or attribute in the right pane:
Built-in property — Under Properties, set the property to the specified value.
Custom attribute — Under Custom Attributes, set the custom attribute to the specified value.
Stereotype property — Under Stereotype Attributes, set the stereotype property to the specified value.
By default, the Requirements Editor displays loaded requirements in alphabetical order. To reduce the number of requirements displayed, search displayed requirements.
Open a requirement set.
In the View section, click Show Requirements.
In the Edit section, click Search.
When you perform a search:
A requirement set is not visible if none of the requirements in the set pass the filter. If a child requirement passes the filter, the parent requirement set is also visible.
The filter is not case-sensitive. For example, typing A displays the requirements whose columns contain an uppercase or lowercase A.
The filter applies to the columns in the editor. If you add columns, the filter automatically applies to them.
By default, the Requirements Editor displays links to loaded requirement sets, in alphabetical order. To reduce the number of links displayed, search displayed links.
Open a requirement set.
In the View section, click Show Links.
In the Edit section, click Search.
To display additional columns in the left pane:
Decide if you want to view requirement or link sets. To view requirement sets, in the View section, click Show Requirements. To view link sets, in the View section, click Show Links.
In the View section, click the Columns button
.
If you selected Show Requirements, you can select from these options:
Implementation Status: Displays the implementation status summaries for your requirement sets. For more information, see Track Requirement Links by Using Implementation Status.
Verification Status: Displays the verification status summaries for your requirement sets. For more information, see Review Requirements Verification Status.
Select Attributes: Select additional attributes to display. You can display built-in properties, custom attributes, or stereotype properties.
If you selected Show Links, you can only click Select Attributes. You can display built-in properties, custom attributes, or stereotype properties.
Once you display the attributes, you can filter them with the Search feature.
To import requirements from a third-party requirements application:
In the File section, click Import to open the Import Requirements window.
In the Document Type property, select the file format. You can select Microsoft® Word, Microsoft Excel®, ReqIF™ File, and IBM® DOORS® Next.
In the Document Location property, select the location of the file.
Set the import options. Each format has different import options.
If you import the requirements, Requirements Toolbox™ creates an slreq.Requirement object for each requirement. If you import the requirements
as referenced requirements, Requirements Toolbox creates an slreq.Reference object for each requirement. For more information, see Import Requirements from Third-Party Applications.
To create a report for one or more requirement sets:
In the Share section, click Export > Generate Report. The Report Generation Options window opens.
Set the file name and location of the report by clicking the Select button.
Select the report content options.
Select the requirement sets to include in the report. The Included Requirement Sets section displays the loaded requirement sets. To add a requirement set, open the requirement set using the Requirements Editor.
Click Generate Report.
For more information, see Report Requirements Information.
To access the Traceability Matrix window:
In the Analyze section, click Traceability Matrix. You can then create a traceability matrix in the window. For more information, see Track Requirement Links with a Traceability Matrix.
To create a traceability diagram:
Click a requirement set.
In the Analyze section, click Traceability Diagram.
For more information, see Visualize Links with Traceability Diagrams.
If you have a license for Simulink Check™, you can also open the Project Model Testing dashboard. To open the Project Model Testing dashboard:
In the Analyze section, click Model Testing Dashboard. For more information, see Assess Requirements-Based Testing Quality by Using the Model Testing Dashboard (Simulink Check) and Explore Status and Quality of Testing Activities Using Model Testing Dashboard (Simulink Check).
Parameters
View
Show the loaded requirements and requirement sets. To enable this parameter, in the View section, click Show Requirements.You can enable this parameter or the Show Links parameter.
Show the loaded links and link sets. To enable this parameter, in the View section, click Show Links. You can enable this parameter or the Show Requirements parameter.
Select attributes and information to display when viewing loaded requirement and
link sets. In the View section, click the
Columns button ![]() . Once you display the attributes, you can filter them
with the Search feature.
. Once you display the attributes, you can filter them
with the Search feature.
Select information you want to display in individual requirements. To access this
parameter, in the View section, click the
Information button ![]() . You can then select the following information types:
. You can then select the following information types:
Change Information: Indicates changes to requirements. For more information, see Track Changes to Requirement Links.
Comments: Adds the comment section in the right pane of selected requirements.
Code Traceability: Displays code traceability information of requirements. For more information, see Link MATLAB Code to Requirements.
The default information types displayed are Change Information and Comments.
Tips
You can use the Requirements Manager to edit and link requirements without leaving the Simulink model. Open the Requirements Manager in a Simulink model by navigating to the Apps tab and, under Model Verification, Validation, and Test, clicking Requirements Manager.
Click Refresh button in the Requirements Editor to see the updated changes when you select the option button in the Base, Mine, or Theirs column in the Comparison tool.