Build Battery Models with Custom Topologies
R2026bThis example shows how to create and build a Simscape™ model of a battery module with a custom cell topology. Custom topologies let you define arbitrary cell placement along a two-dimensional grid that the predefined topologies, such as hexagonal or square, do not support. You can create a custom topology programmatically or by using the Battery Builder app.
In this example, you arrange 21700-format cylindrical cells in a honeycomb ring pattern with two concentric rings and an empty center. The battery pack uses a 6S3P architecture, consisting of six series-connected groups of three parallel-connected cells. The inner ring consists of six cells and the outer ring consists of 12 cells, for a total of 18 cells. You can use this type of arrangement for power tool battery packs where the designer must fit cells into a cylindrical enclosure while maximizing thermal dissipation through the hollow center. With a 6S3P architecture, the module delivers a nominal voltage of 21.6 V and a capacity of 15 Ah.
To create the system model with a custom topology, follow these steps:
Define the cell center positions.
Create a
Topologyobject.Build the battery module hierarchy.
Use the
buildBatteryfunction to generate the Simscape model.
To learn how to create the custom topology programmatically, see Create Custom Topology in MATLAB.
To learn how to create the custom topology by using the Battery Builder app, see Create Custom Topology in Battery Builder App.
Create Custom Topology in MATLAB®
This section shows you how to programmatically create a custom topology with the cell center positions loaded from a spreadsheet.
Load Cell Center Positions
The honeycombRingPositions.xlsx file stores the center positions for the honeycomb ring topology. The spreadsheet contains four columns: X and Y coordinates in meters, CellID, and ParallelAssemblyID. Load the cell positions using the readtable function. The X and Y columns are required. The CellID and ParallelAssemblyID columns are optional.
cellPositions = readtable("honeycombRingPositions.xlsx")cellPositions = 18×4 table
X Y CellID ParallelAssemblyID
________ ________ ______ __________________
0.0795 0.0565 1 1
0.068 0.076419 1 2
0.045 0.076419 1 3
0.0335 0.0565 1 4
0.045 0.036581 1 5
0.068 0.036581 1 6
0.1015 0.0565 2 1
0.095471 0.079 2 2
0.079 0.095471 3 2
0.0565 0.1015 2 3
0.034 0.095471 3 3
0.017529 0.079 2 4
0.0115 0.0565 3 4
0.017529 0.034 2 5
0.034 0.017529 3 5
0.0565 0.0115 2 6
⋮
The table contains 18 rows, one for each cell in the custom topology. The inner ring contains six cells spaced at 60-degree intervals and the outer ring contains 12 cells spaced at 30-degree intervals. Each parallel assembly groups one inner-ring cell with two adjacent outer-ring cells, resulting in six parallel assemblies of three cells each.
Create Cell Object
Create a Cell object with a cylindrical geometry. This object represents a 21700-format cylindrical cell with a height of 70 mm and a diameter of 21 mm. The CylindricalGeometry object defines the cell dimensions. Use the batteryCylindricalGeometry function with the cell height as the first argument and the radius as the second argument.
cylindricalGeometry = batteryCylindricalGeometry(simscape.Value(0.070,"m"),...
    simscape.Value(0.0105,"m"));
Create a cylindrical battery cell by using the batteryCell function and the CylindricalGeometry object.
cylindricalCell = batteryCell(cylindricalGeometry);
To enable thermal modeling, add a thermal model to the cell model block.
cylindricalCell.CellModelOptions.BlockParameters.ThermalModel = "LumpedThermalMass";Create Topology Object
Create a custom Topology object that defines the honeycomb ring arrangement. Specify the cell center positions as a table or matrix. The Topology object then validates that the cell positions do not overlap and that all coordinates are in the topology bounds.
To create the Topology object, specify these arguments:
Topology name
Number of parallel cells
Number of series assemblies
Battery cell
Cell center positions, loaded from the spreadsheet.
This topology has three cells in parallel and six assemblies in series, forming a 6S3P architecture.
topology = simscape.battery.builder.Topology(...
    Name="HoneycombRing",...
    NumParallelCells=3,...
    NumSeriesAssemblies=6,...
    BatteryCell=cylindricalCell,...
    CellCenterPositions=cellPositions);
Create ParallelAssembly Object
A battery parallel assembly comprises multiple battery cells connected electrically in parallel under a specific topological configuration or geometrical arrangement. In this example, you create a parallel assembly of three cylindrical cells connected in parallel. Each parallel assembly represents one series group in the 6S3P module.
To create the ParallelAssembly object, use the batteryParallelAssembly function. Define the Cell object as the first argument and the number of cells in parallel as the second argument.
parallelAssembly = batteryParallelAssembly(cylindricalCell,3);
Build Battery Module and Visualize Custom Topology
This section shows how to create a battery module from the parallel assembly with the custom topology, visualize the arrangement, and build the Simscape model.
Create Module Object
A battery module comprises multiple parallel assemblies connected in series. In this example, you create a battery module of six parallel assemblies connected in series, forming the 6S3P architecture. With six series groups of cells at 3.6 V nominal voltage, the module delivers a nominal voltage of 21.6 V. With three cells in parallel at 5 Ah each, the module capacity is 15 Ah, for a total energy of 324 Wh.
To create the Module object, use the batteryModule function. Define the ParallelAssembly object as the first argument and the number of parallel assemblies in series as the second argument. To define the physical cell layout at the module level, specify the custom topology with the Topology name-value argument.
module = batteryModule(parallelAssembly,6,...
    Topology=topology,...
    InterParallelAssemblyGap=simscape.Value(0.001,"m"),...
    ModelResolution="Detailed");
Visualize Battery Module
To obtain the number of Battery Equivalent Circuit blocks used for the module simulation, use the NumModels property of your Module object.
disp(module.NumModels)
18
To visualize the battery module before you build the system model and to view its model resolution, use the batteryChart function. The custom honeycomb ring topology is visible in the cell arrangement in the module.
f = figure(Color="w",Position=[0 0 1200 500]);
tl = tiledlayout(1,2,Parent=f,TileSpacing="compact",Padding="tight");
nexttile(tl)
batteryChart(tl,module);
nexttile(tl)
batteryChart(tl,module,SimulationStrategyVisible="On");
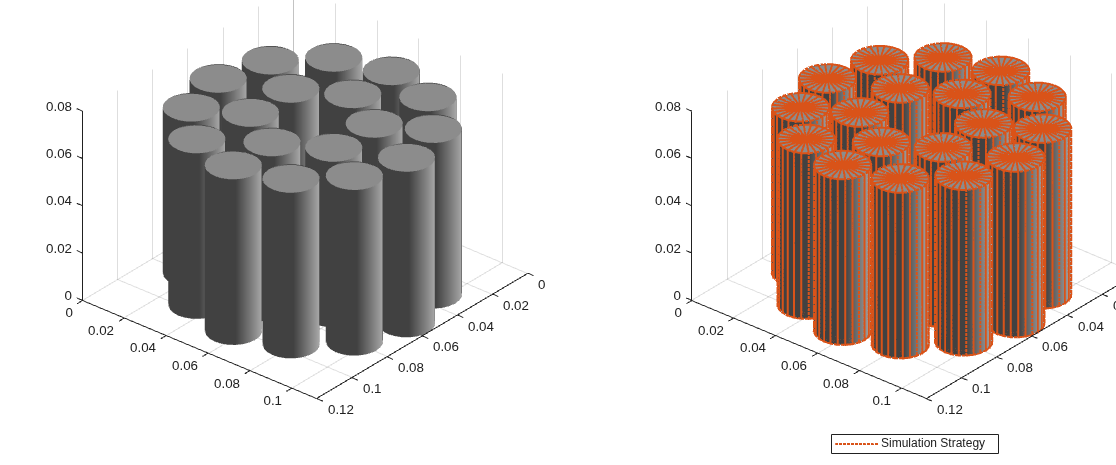
The left plot shows the physical arrangement of the cells in the honeycomb ring pattern. The right plot shows the model resolution, where each color represents a different simulation group. By setting the ModelResolution property to "Detailed", the software models each cell individually.
To maximize simulation performance while using custom topologies, you can also change model resolution as desired. Create a new grouped module and set a custom model resolution.
groupedModule = module;
groupedModule.ParallelGrouping = [1,1,1,1,1,1];

f = figure(Color="w",Position=[0 0 1200 500]);
tl = tiledlayout(1,2,Parent=f,TileSpacing="compact",Padding="tight");
nexttile(tl)
batteryChart(tl,groupedModule);
nexttile(tl)
batteryChart(tl,groupedModule,SimulationStrategyVisible="On");
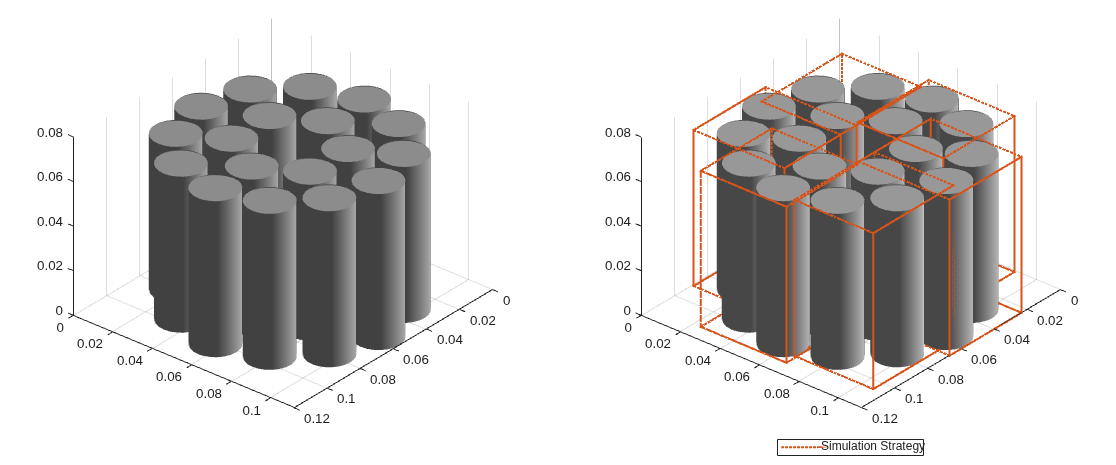
Create Pack Object and Build Simscape Model
After you create your battery module, you can assemble it into a pack and convert it into a Simscape model to use in block diagrams. You can then use this model as a reference for your system integration and requirement evaluation, cooling system design, control strategy development, hardware-in-the-loop, and many more applications.
Create a ModuleAssembly object by using the batteryModuleAssembly function. Define the Module object as the first argument and the gap between modules as the second argument
moduleAssembly = batteryModuleAssembly(module,...
    InterModuleGap=simscape.Value(0.05,"m"));
Create a Pack object by using the batteryPack function. Define the ModuleAssembly object as the first argument and the gap between module assemblies as the second argument
pack = batteryPack(moduleAssembly,...
    InterModuleAssemblyGap=simscape.Value(0.01,"m"));
To create a library that contains the Simscape Battery model of the Pack object, use the buildBattery function.
buildBattery(pack,LibraryName="honeycombPackLibrary",...
    MaskParameters="VariableNamesByType",...
    Verbose="off");
This function creates the honeycombPackLibrary_lib and honeycombPackLibrary SLX library files in your working folder. The honeycombPackLibrary_lib library contains the Simscape models of your Module and ParallelAssembly objects. The honeycombPackLibrary library contains the Simscape models of your ModuleAssembly and Pack objects as subsystems. Setting the MaskParameters argument to "VariableNamesByType" generates variable names grouped by parameter type in the block masks. This grouping simplifies the parameterization when you use the models in your simulations.
To access the Simscape models of your battery objects, open the library files and drag the Simscape blocks into your model.
Create Custom Topology in Battery Builder App
In the previous sections, you programmatically created the battery module with a custom topology by calling the relevant objects and functions at the MATLAB® Command Window. Alternatively, if you prefer a more interactive and visual approach, you can use the Battery Builder app. Using this app, you can interactively import custom topologies, explore and edit properties, and view the battery hierarchy and 3-D visualization. You can then build the Simscape system model of your objects and use it as a reference in your simulations.
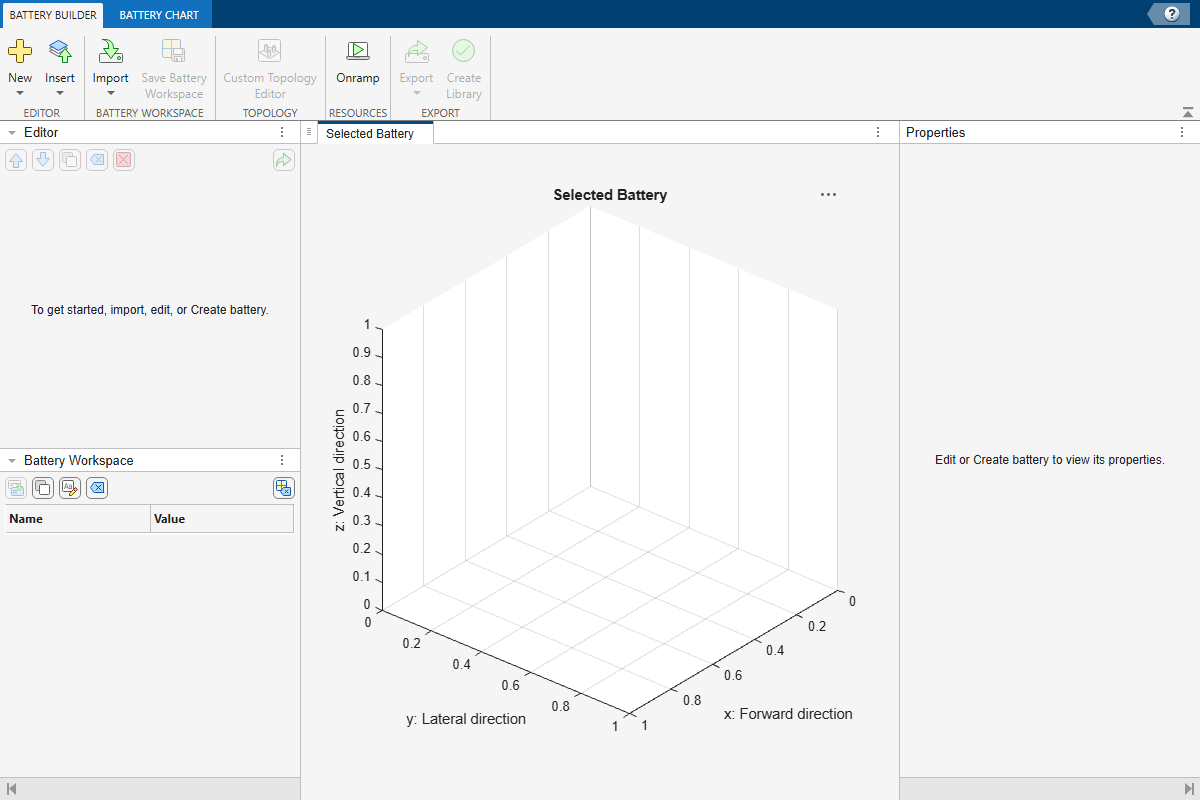
Open the Battery Builder App
Open the Battery Builder app. On the Apps tab, under Simscape, click the Battery Builder icon. Alternatively, you can open the app from the command line by typing batteryBuilder.
Switch to Custom Topology Tab
You can create a custom topology only from a ParallelAssembly or Module object.
Create a new Module object.
Under the Battery Builder tab, in the Editor section, click New > Module.
In the Editor panel on the left, click Cell (Cell 1).
In the Properties panel on the right, in the Geometry section, select
Cylindricalfor the Geometry property.
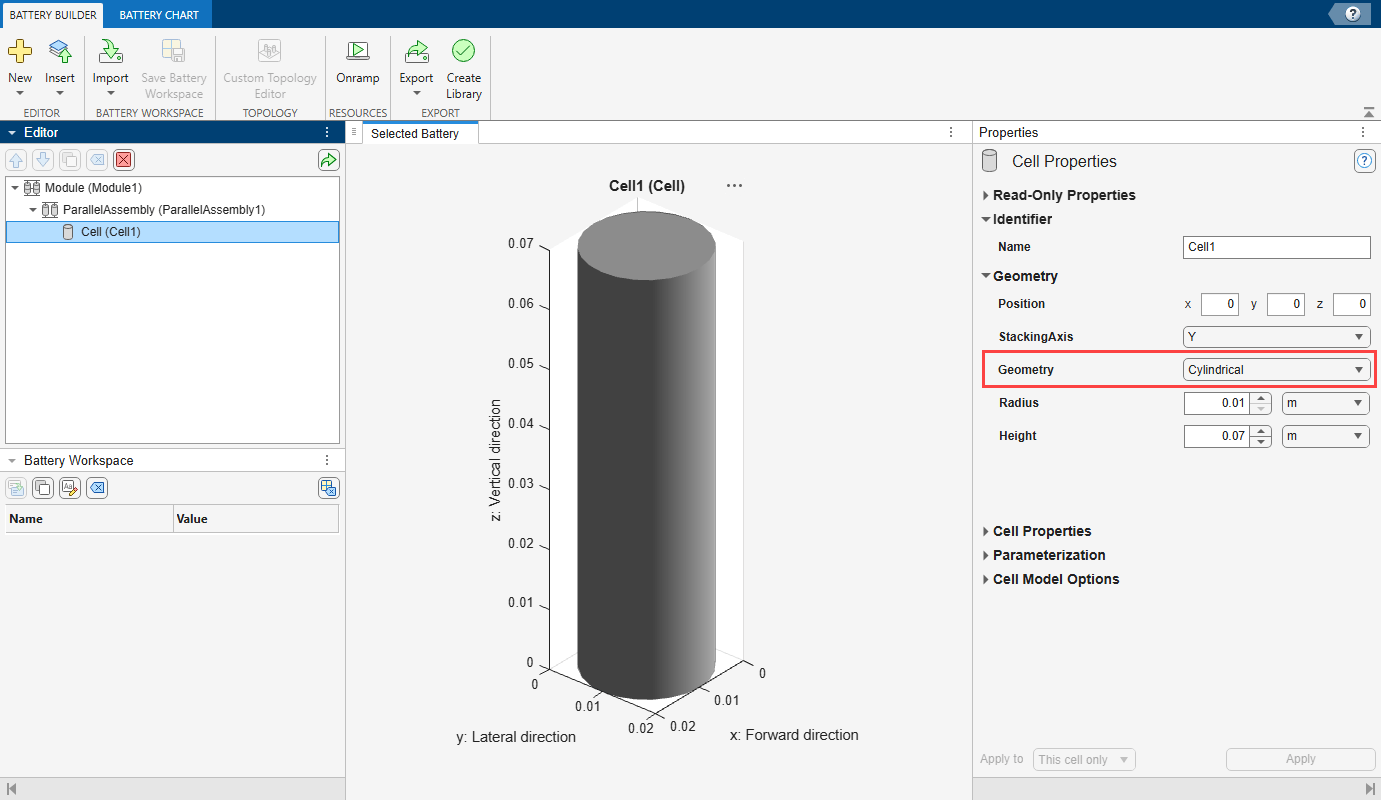
To open the Custom Topology tab, select Module (Module1) in the Editor panel and, in the Topology section of the toolstrip, click Custom Topology Editor. Use this tab to import cell positions, place cells interactively, and configure topology properties.
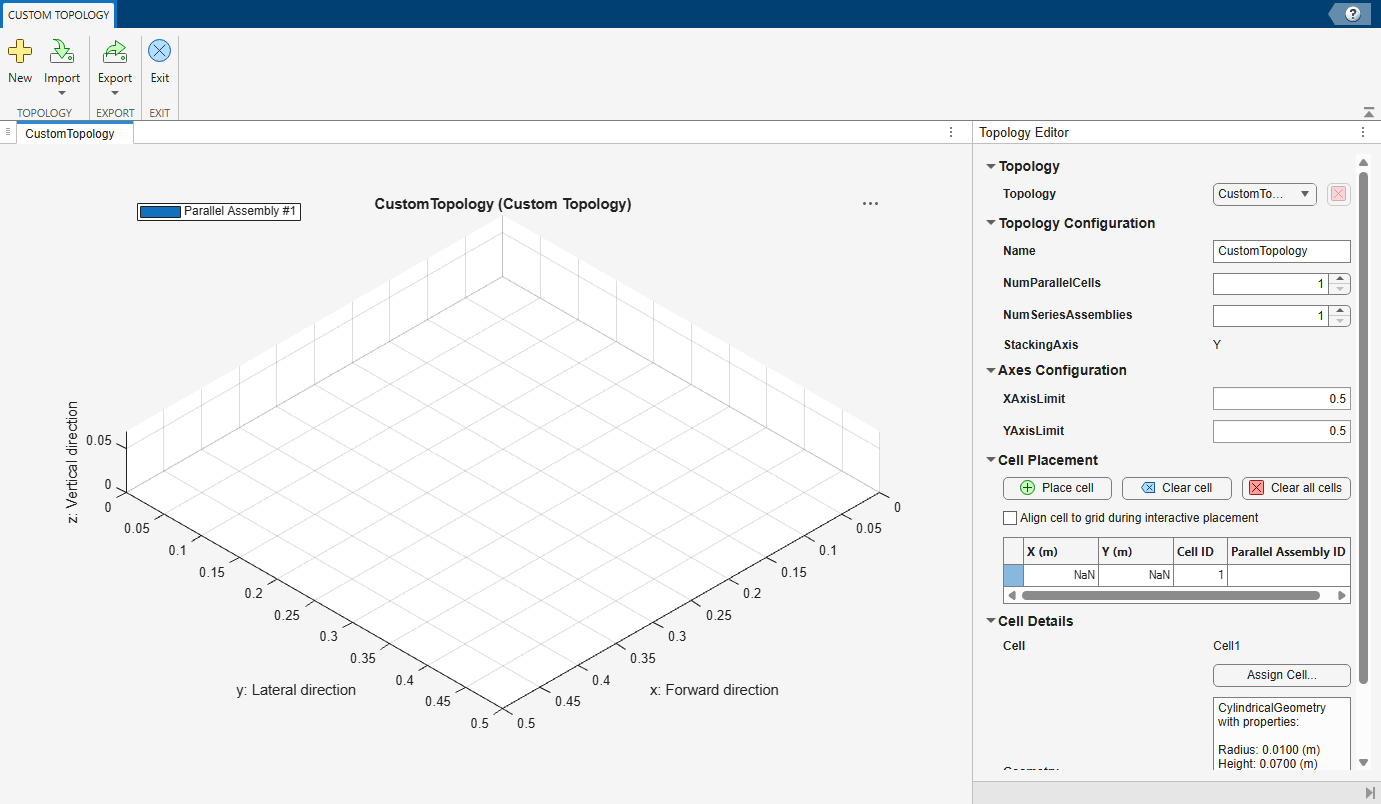
Import Cell Positions and Configure Topology Properties
To import the cell positions from a spreadsheet, under the Custom Topology tab, in the Topology section of the toolstrip, click Import > Import from File and select the honeycombRingPositions.xlsx file. The Battery Builder app reads the X and Y columns from the spreadsheet and places the cells at the specified coordinates.
After importing the cell positions, specify the topology properties in the Topology Editor panel.
In the Topology Configuration section, set the topology Name property to
HoneycombRing.To better visualize the topology, in the Axes Configuration section, set the XAxisLimit and YAxisLimit properties to
0.12.The table in the Cell Placement section displays all 18 cell centers loaded from the spreadsheet.
In the Cell Details section, click Assign Cell to assign the cylindrical cell geometry and choose the desired cell format.
The Battery Builder app displays the custom topology arrangement in the main visualization pane. Verify that the 18 cells appear in the expected honeycomb ring pattern with six cells in the inner ring and 12 cells in the outer ring.
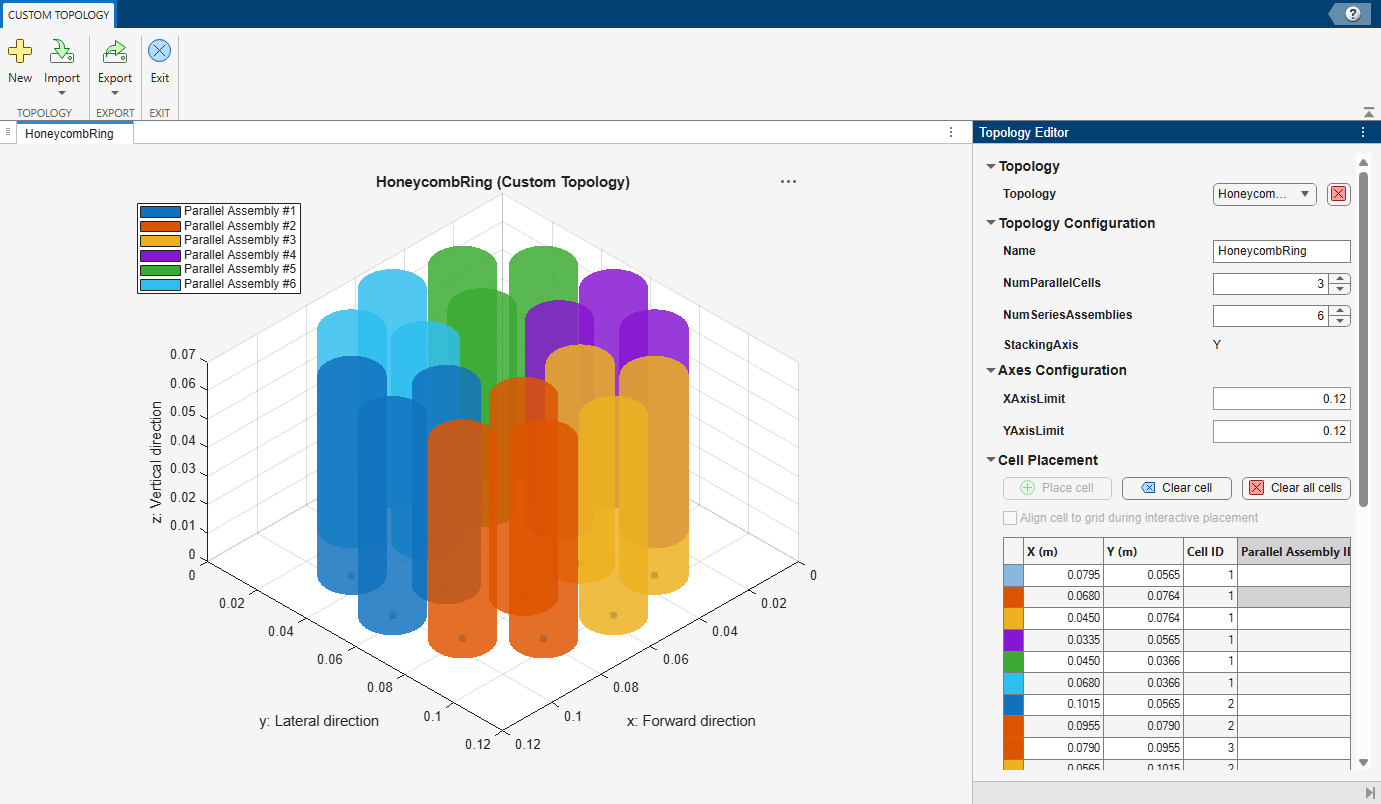
To exit the Custom Topology tab, in the Exit section of the toolstrip, click Exit.
Set Custom Topology to Module
Set the custom topology you created to the Module object.
In the Editor panel, select Module (Module1).
In the Properties panel, in the Module Properties section, select the Use Custom Topology checkbox and select the
HoneycombRingtopology from the drop-down list.Click Apply to assign the custom topology to the module.
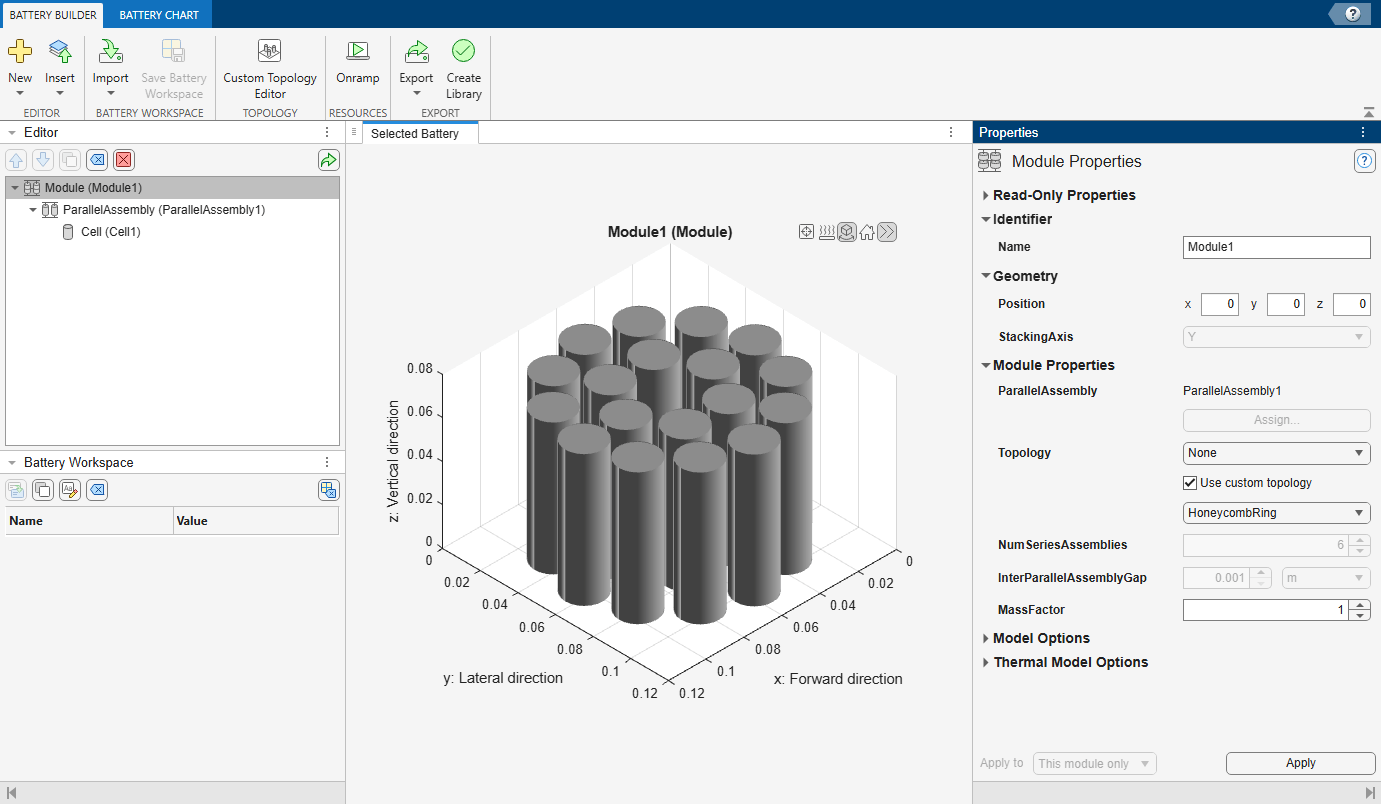
The Selected Battery tab displays the 3-D visualization of the module with the custom honeycomb ring topology. You can rotate, zoom, and pan the visualization to inspect the cell arrangement.
Build Library
To create a library model of the Module object with the custom topology, under the Battery Builder tab, in the Export section of the toolstrip, click Create Library. In the new window, specify the folder in which you want to save the library and the library name.
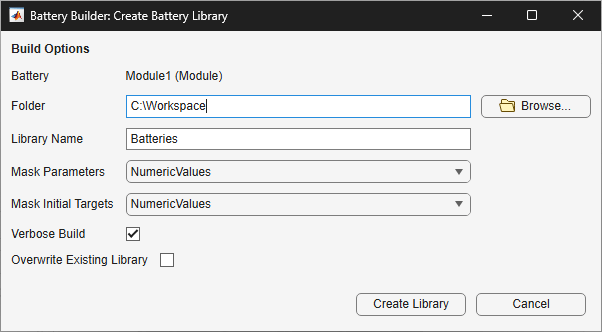
Click Create Library to generate the library model of your battery object in the specified folder. Open this model to access your battery objects as Simscape blocks that you can use as a starting point for architecture evaluation in early development stages, software and hardware development, system integration and requirement evaluation, cooling system design, control strategy development, hardware-in-the-loop, and many more applications.

